Contents
If your dryer’s drum isn’t spinning, it may be time to replace the dryer belt. While this may seem like a daunting task, with a little bit of know-how and some basic tools, you can replace the dryer belt yourself and save money on a repair technician.

Why Does Dryer Belt Need a Replacement? Common Problems
The dryer belt is an important component of your dryer that helps rotate the drum, allowing clothes to tumble and dry evenly. Over time, the dryer belt can become worn or damaged, leading to a variety of problems that can affect the performance of your dryer.
Here are some common problems that may indicate it’s time to replace the dryer belt:
- The dryer drum is not spinning: If the dryer drum isn’t rotating, it’s likely that the belt has broken or become too worn to operate properly. The dryer belt is responsible for turning the drum, and if it’s broken or worn out, the drum won’t be able to spin. In this case, the belt will need to be replaced by a professional appliance repair technician. It’s important to address this issue promptly, as a broken belt can cause additional damage to the dryer.
- The dryer is making loud noises: A worn or damaged dryer belt can cause the drum to make loud thumping or squeaking noises as it spins. This is because the belt is no longer able to grip the drum tightly, causing it to slip and create noise. If you notice your dryer making unusual noises, it’s important to have it checked by a professional appliance repair technician as soon as possible. Ignoring the issue can cause additional damage to the dryer and increase the risk of a breakdown.
- The dryer is producing an unpleasant burning smell:
- If you notice a burning smell coming from your dryer, it could be a sign that the dryer belt is slipping or rubbing against other parts of the machine. When the belt slips, it generates heat due to friction and can produce a burning smell. In some cases, the belt may also break or wear out, which can cause the drum to stop spinning altogether. It’s important to address this issue as soon as possible to prevent further damage to your dryer and to avoid potential safety hazards.
- Clothes are taking longer to dry: If your clothes are taking longer to dry than usual, it could be a sign that the dryer belt is loose or worn out. The belt is responsible for turning the drum, which helps to circulate hot air around your clothes and dry them more quickly. If the belt is loose or worn, the drum may spin more slowly, which can result in longer drying times and higher energy bills. In addition to the belt, other factors such as clogged dryer vents, a malfunctioning heating element, or a faulty thermostat can also cause clothes to take longer to dry.
- The dryer is vibrating excessively: If your dryer is vibrating excessively, it could be a sign that the dryer belt is loose or damaged. The belt helps to keep the drum centered and balanced, so if it’s loose or damaged, the drum may wobble and vibrate excessively. This can cause damage to other components of the dryer and lead to additional problems down the line. In some cases, the vibration may also be caused by a damaged roller or drum bearing, which can also cause the drum to wobble and vibrate. If you notice excessive vibration coming from your dryer, it’s important to have it inspected and repaired by a professional as soon as possible to prevent further damage.
If you’re experiencing any of these issues with your dryer, it’s important to inspect the dryer belt for signs of wear or damage. If you notice any cracks, fraying, or stretching, it’s time to replace the dryer belt.
Replacing the dryer belt can be a simple and cost-effective solution to these common problems, and with a little bit of know-how and the proper tools, you can replace the dryer belt yourself and save money on a repair technician.

Steps to Replace Dryer Belt Yourself
The main steps for dryer belt replacement:
- Unplug the dryer: Before you begin any repairs, make sure to unplug the dryer from the electrical outlet to avoid any electrical hazards. This is a critical safety step that you should never skip.
- Access the dryer belt: To access the dryer belt, you’ll need to remove the front panel of the dryer. To do this, you’ll first need to locate the screws that hold the panel in place. They are typically located on the top and bottom of the panel. Use a screwdriver to remove these screws and set them aside. Once the screws are removed, carefully pull the panel away from the dryer. You may need to disconnect wires that connect the panel to the dryer as well.
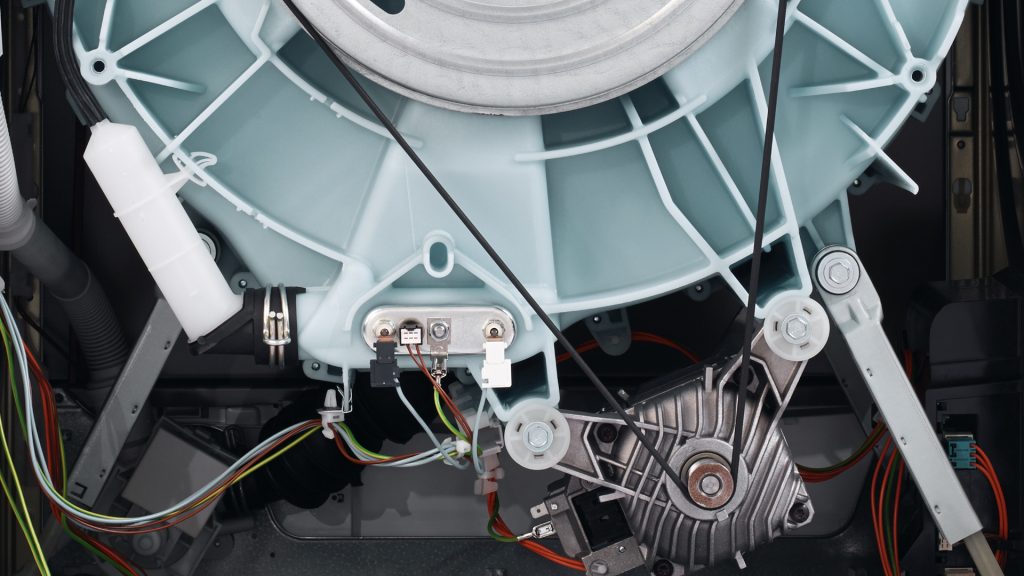
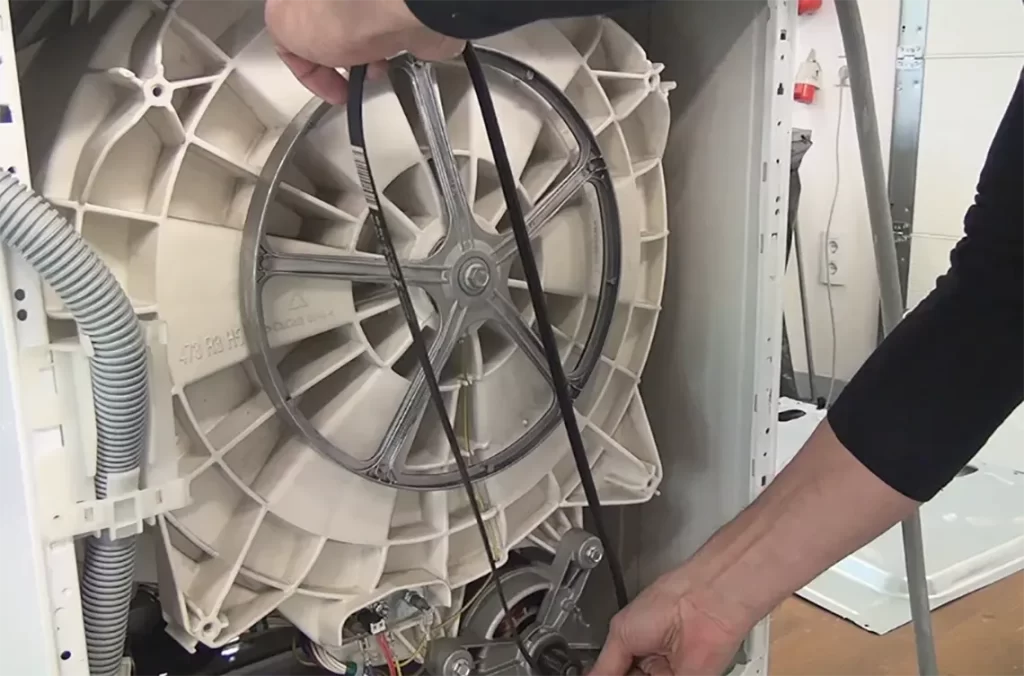
- Remove the old belt: Once you’ve accessed the dryer belt, you can remove the old belt by releasing the tension on the idler pulley. The idler pulley is typically located near the motor pulley and provides tension on the belt to keep it tight. To release the tension, use a wrench or pliers to release the spring-loaded arm of the idler pulley. Once the tension is released, slide the belt off the motor pulley.
- Install the new belt: To install the new belt, first thread it around the drum of the dryer. Make sure the belt is properly aligned and positioned correctly. Then, thread the belt over the motor pulley and the idler pulley. You will need to reapply tension to the idler pulley using the same wrench or pliers you used earlier. Make sure the belt is tight and properly aligned.
- Reassemble the dryer: After installing the new belt, reattach the front panel of the dryer. Carefully line up the panel with the front of the dryer and secure it in place using the screws you removed earlier. Reconnect any wires that were disconnected during the process.
- Test the dryer: Finally, plug the dryer back in and turn it on to make sure the drum is spinning properly. Listen for any unusual sounds or vibrations that may indicate a problem. If everything seems to be working correctly, congratulations! You’ve successfully repaired your dryer belt.
While replacing the dryer belt yourself can save you money, it’s important to note that some dryer models may require additional steps or different tools. It’s always a good idea to consult the manufacturer’s manual or seek the advice of a professional if you’re unsure about any aspect of the repair process.
What if It Didn’t Work? We Will Help
Our team can help with dryer belt replacements, ensuring that your dryer is up and running again in no time. We use only high-quality replacement parts to ensure that your appliance is working efficiently and effectively.
In addition to dryer belt replacements, we can also help with a range of other appliance problems. Whether your refrigerator is not cooling properly, your washer is leaking, or your oven is not heating up, our team has the expertise to get your appliance back to its optimal condition.
At our appliance repair company, we understand the importance of having a fully functional home appliance. That’s why we offer fast, reliable, and affordable services to our customers. We also provide a warranty on all our repairs, giving you peace of mind that your appliance is in good hands.
If you’re experiencing any issues with your home appliance, don’t hesitate to contact us today. We’re here to help with all your appliance repair needs.
